Installation (Windows)

Introduction
This guide will take you through the installation process for the Acute Lymphoblastic Leukemia Detection System For Oculus Rift on your Windows machine.
Prerequisites
You will need to ensure you have the following prerequisites installed and setup.
HIAS Core
For this project you will need a functioning HIAS Core. To install HIAS Core follow the HIAS Core Installation Guide
HIAS Acute Lymphoblastic Leukemia Classifier
For this project you will need a running HIAS Acute Lymphoblastic Leukemia Classifier on your Raspberry Pi.
Clone the repository
Clone the Acute Lymphoblastic Leukemia Detection System For Oculus Rift repository from the Peter Moss MedTech Research Project Github Organization.
To clone the repository make sure you have Git installed. Now navigate to the a directory on your device using commandline, and then use the following command.
git clone https://github.com/aiial/all-detection-system-for-oculus-rift.git
Once you have used the command above you will see a directory called all-detection-system-for-oculus-rift in your home directory.
ls
Using the ls command in your home directory should show you the following.
all-detection-system-for-oculus-rift
Navigate to the all-detection-system-for-oculus-rift directory, this is your project root directory for this tutorial.
Unity Hub
For the Oculus Rift app you need Unity. First you need to download Unity Hub. You can follow the Installing the Unity Hub in the Unity documentation to do so.

Go to the Installs tab in Unity Hub and select 2020.1.17f1 (LTS), click next and continue until Unity 2020.1.17f1 (LTS) is installed.
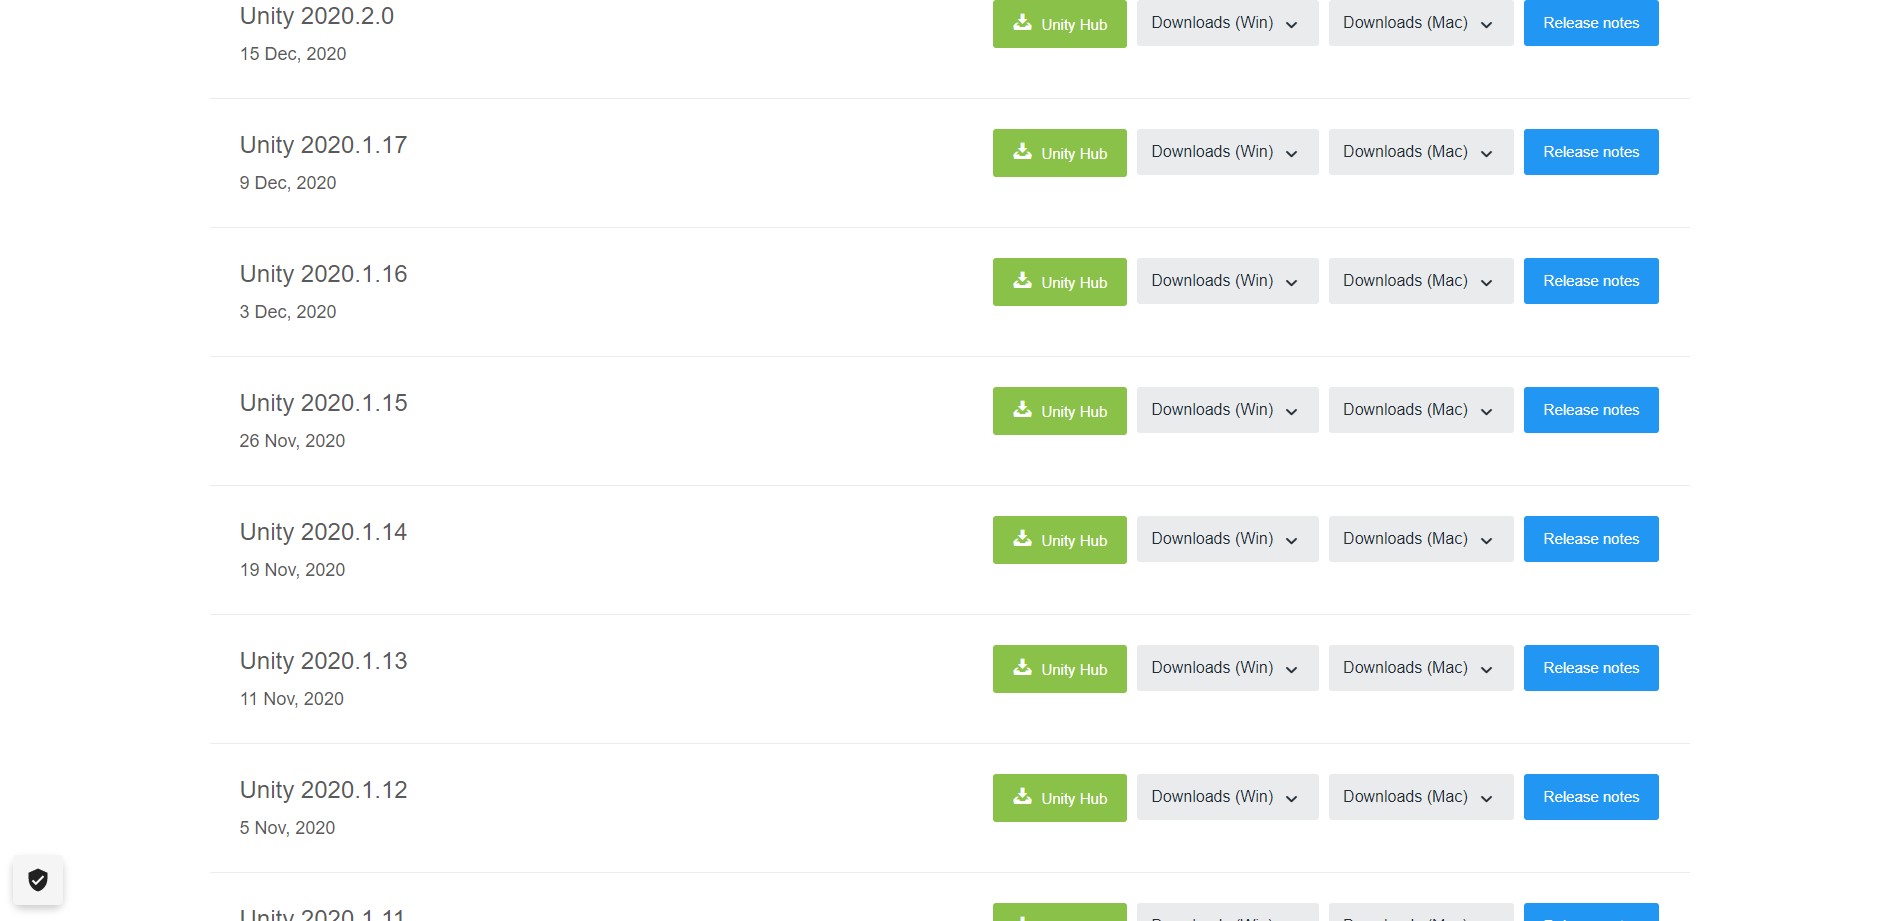
If you cannot find 2020.1.17f1 (LTS) in the list then visit the downloads archive, switch to the Unity 2020.x tab, find the download for 2020.1.17f1 (LTS) and click on the Unity Hub download button.

Click on the ADD button. This will open Windows Explorer allowing you to navigate to the project and import it.
To import ALL Detection System For Oculus Rift into Unity Hub, navigate to the all-detection-system-for-oculus-rift/src/all-detection-system-for-oculus-rift directory and click Select Folder.
Now open the project by double clicking it, once the project opens you should see a blank screen, in the project tab navigate to Assets -> Scenes and double click on the ALL-Detection-System scene.
Oculus Rift
Follow the Import Latest Package Into New Project Import Oculus Integration Package guide to install the required Oculus Rift development tools (You don't need to create a new project, you should use the ALL Detection System For Oculus Rift Unity project).
Follow the Configure Unity Settings for Oculus Rift guide to setup Unity for Oculus Rift development.
3rd Party Assets
This project uses some 3rd party assets for the Unity Asset Store.
- Big Furniture Pack
- Terrain Textures Pack Free
- Standard Assets (for Unity 2018.4)
- HQ Laptop Computer
- Printer Lowpoly
To import these assets click on Open In Unity and then click Import. Once you have imported the assets, they will appear in the scene. Once you have imported the assets, move them to the src/all-detection-system-for-oculus-rift/Assets/3rdParty directory.
HIAS
This device is a HIAS network device and uses the HIAS MQTT Broker to communicate with the HIAS network. To setup a device on the HIAS network, head to the HIAS UI.
The HIAS network is powered by a context broker that stores contextual data and exposes the data securely to authenticated HIAS applications and devices.
Each HIAS device has a JSON representation stored in the HIASCDI Context Broker that holds their contextual information.
Device

To create a HIAS device navigate to iotJumpWay->Entities->Devices and click on the Create Device button.

Once you have completed the form and submitted it you will be provided with the connection details for this device, make sure you save them. You can find the newly created device by navigating to iotJumpWay->Entities->Devices and clicking on the edit button for the relevant device.

On the HIAS device page you will be able to update the contextual data for the model, find the JSON representation and download the credentials for the device.
Configuration

Back in Unity, navigate to Project -> Assets -> Scripts and double click on Raycast.cs, this will open up the Raycast script in Virtual Studio.
Navigate to line 36, here you need to enter the details for the HIAS server and device.
- The value for
apiKeyshould be theIdentifiervalue from the HIAS device edit page. - The value for
apiSecretshould be your API key, if you have not saved it you can reset it using theReset API Keybutton. - The value for
servershould be the HIAS server hostname. - In
serverPathyou need to replaceYourEndpointwith the value you used for the HIAS ALL oneAPI ClassifierInference Endpoint. You can find this value by navigating toAI->Agentsand clicking on the edit button for the relevant AI Agent.
ALL-IDB
Now you need to import the test dataset that was used in the HIAS Acute Lymphoblastic Leukemia Classifier project. Copy the test data to the Assets -> App -> ALL directory, and the Assets -> StreamingAssets directory.
Continue
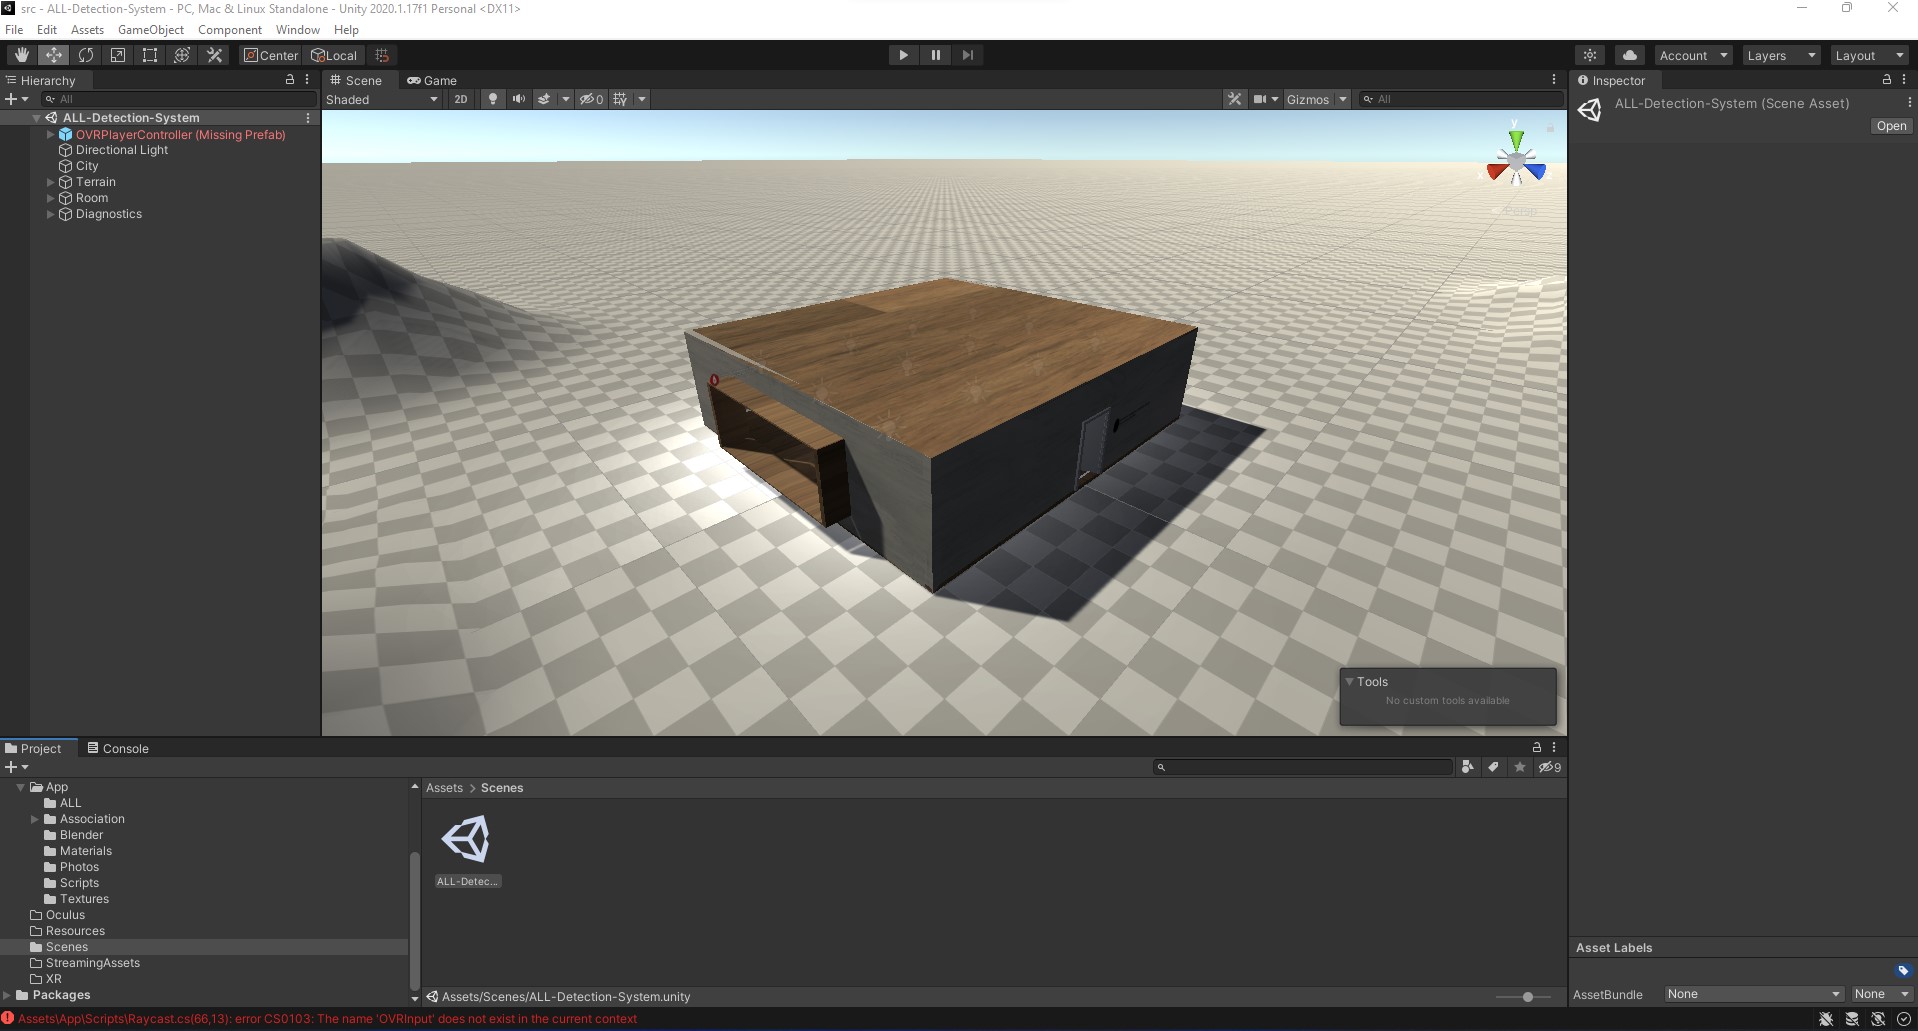
Once you have completed the above, your Unity project should look like the following screenshot.

Now you can continue with the Acute Lymphoblastic Leukemia Detection System For Oculus Rift usage guide guide to learn how to use the project.
Contributing
Asociación de Investigacion en Inteligencia Artificial Para la Leucemia Peter Moss encourages and welcomes code contributions, bug fixes and enhancements from the Github community.
Please read the CONTRIBUTING document for a full guide to forking our repositories and submitting your pull requests. You will also find our code of conduct in the Code of Conduct document.
Contributors
- Adam Milton-Barker - Asociación de Investigacion en Inteligencia Artificial Para la Leucemia Peter Moss President/Founder & Lead Developer, Sabadell, Spain
Versioning
We use SemVer for versioning.
License
This project is licensed under the MIT License - see the LICENSE file for details.
Bugs/Issues
We use the repo issues to track bugs and general requests related to using this project. See CONTRIBUTING for more info on how to submit bugs, feature requests and proposals.